Category Archives: Build Diaries

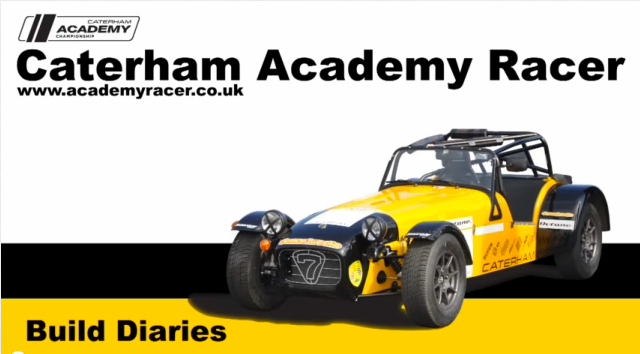
Follow along with the build of my Caterham Academy 2013 car.

That what needs to be done…

So, I’ve had ‘the list’ back from the Post Build Check. I can’t say that the list is unexpected but there are a fair few things on there that need to be resolved to make everything correct.

So, here’s the list of things Caterham will be finishing off/correcting for me.

  • Engine wiring and hose tidying in a correct manor for IVA
    • Expected this one
  • Rectify front left brake hose
    • No idea what’s up with this… perhaps not enough clearance when turning wheel?
  • Rectify drivers seat (on my list)
    • As I hadn’t done this, it was expected!
  • Remove fan washers
    • Guess I added some where none were needed!
  • Rectify tunnel wiring (on my list)
    • Relates to attaching the wire to the wrong terminal on the handbrake. Was on my list of things to resolve.
  • Trim knee trim panels
    • Guessing this was trim that needs to be added to one of the edges of the panel – and I guess I hadn’t done it. Can’t remember seeing this in the IVA guide.
  • Fit wheel nut spacers
    • These aren’t mentioned in the manual, but they resemble large washers with a chamfered edge. I hadn’t noticed them in my kit and didn’t know they needed fitting. Not even sure how they are fitted! But anyway, they need adding!
  • Rectify ear bolts and washers
    • The manual is so utterly crap here that I’m not surprised I got some of it wrong. This section of the manual needs urgent attention! It mixes references from one bag of parts to another with gay abandon and doesn’t make anything clear!
  • Fit locknut on 3-way
    • Guessing this is the brake hose 3-way on the de-dion. Not sure what the manual says on this but it’s ether me or it that is wrong.
  • Correct washers on rear brake hose
    • Missed off the correct washers where the de-dion flexiblebrake hose meets the chassis fixed hose. Think it needs anti-shake washer and plain.
  • Spring washers to passenger seat bolts
    • Manual say plain washer but clearly, it needs to be a spring washers.
  • Rectify crossed handbrake cable
    • Doh! Can’t say I noticed this at all and I’m surprised I did… the adjuster was on the correct side of the diff so it must have been when attaching to the handbrake cable I made a boob… strange that I didn’t notice this though.
  • Rectify rear wiring
    • No idea on this. All lights appeared to work OK before I left! Guessing it’s IVA related but I could be wrong.
  • Rectify starter motor bolt (on my list)
    • Bolt half in. Knew it would need resolving! So no surprises here.
  • Rectify engine mount bolts
    • No idea! One did appear longer than the others and again, the manual isn’t very clear here so I’m not surprised something wasn’t quite right.
  • Bleed brakes
    • Of course… and good thing as I never got the pedal as firm as I would like. Glad that I used Caterham standard fluid rather than anything more exotic.
  • Tighten handbrake cable
    • Fair enough after un-crossing.

All that adds up to £408 + VAT Ouchy.

I’m way way over my monthly budget this month. Road insurance, IVA fee, Caterham IVA presentation, road tax, car registration and now this! Sigh.
Day 19 Summary

Day 19 was all a bit of a blur! Essentially, it was just a case of finishing off a few minor bits of the build. Starting with the extension and connection of the fuel tank earth. The tidying away of the lamba probe wire. Pressuring the tyres correctly and getting the car on the ground!

UPDATE: I extended the fuel tank earth using a bit of wire we’d chopped off the number plate light. The Lamba wire was attached using some handy oblong shaped blocks that were in the internal trim fixing kit (along with a whole tonne of rivets and self tapping screws. the block has a hole in the centre for a self tapper and slots at either end to accept a cable tie. We used ally tape to route the cable up the edge of the drivers footwell and into the engine bay.

There was some final torquing and checks to carry out as well but nothing that took too long.

For such a small car, I was amazed how much we managed to faff about getting it onto the floor! I was all for manual labour, but then more sensible people than me suggested that slipped discs at this point were’t a good idea. So, instead we went the sensible route, first getting the rear of the car onto some ramps and then using the engine hoist around the front suspension to get the front lowered to the ground.

Once there, it is absolutely amazing just how low the car is! I’ve sat in a fair few Caterhams now and come across them often enough but having seen this one on high axle stands for over 2 weeks give you a different impression of the car and when it finally lands – it takes a little getting used to how low everything is!

The nosecone and bonnet went on. Not with perfect alignment of course! But they went on and the final step was to stick the front badge into place. It was a proud moment and it was just brilliant to finally see the final product sat on the drive.

I had to get the car into position for the trailer so even got to drive it – just for a short while!

I was a little concerned that my brake light warning light was on… it appeared to go out when the handbrake was up and go out when it was down. Opposite to how you might expect. I will have to add this to my list of things for Caterham to look at for me but at this moment, I’m hoping that I simply attached the wire to the handbrake on the wrong terminal.

It wasn’t as easy as I’d hoped getting it onto the trailer and the fit is extremely tight. However, it does fit and I’m all ready to deliver to Caterham for post build and IVA (just as soon as I get told my date.)

It was a strange come down to finally finish it. There were certainly mixed emotions. There will be another intolerable wait now whilst I await the car being declared road legal. And then, it will be all guns blazing :). Can’t wait.

Day 18 Summary

A late start for me today. There wasn’t a whole lot to get done but, seen as I didn’t get everything finished off today, there must have been more than I thought!

We got the front lighting wires insulated and tucked away into their final places. I got a local fabricator to chop down an allen key for me so I could finally torque up the left side engine mount. I cleared out all the empty boxes and rubbish from the garage.

We checked all the lighting was present and correct.

I also went through the IVA checklist as far as I could work it out! We hit some snags though… firstly we found that the earth lead for the fuel tank that had been fitted wasn’t nearly long enough to reach the bolt that it has to attach to. There were loads of small cap covers for bolts that I have no idea where where they go.

UPDATE: The manual doesn’t make it fantastically clear where the fuel earth is supposed to attach to and the new IVA guides picture is vague at best – but essentially, it attaches to the lower bolt that attaches the rear right wing in place.

A few more trim items were glued into place.

I also purchased som brake cleaner to get rid of some of the gunk that was on my discs when they arrived.

I also managed the near impossible task of attaching the wing mirrors to their SVA stalks and got them on the car. The rear view mirror also went in place.

UPDATE: The mirror stalks became easier to achieve once you notice that there is a flat edge to one of the components that matches a flat edge in the hole on the stalk. Lining up the flat edges together and then using some pointy pliers to pull it home before screwing in the screw. I realise that none of that makes much sense! but I don’t have the words to describe it clearly! Hopefully some of my mumblings will make sense if you’ve got the parts in front of you! Oh, and brake cleaner sprayed onto a clan cloth made a great glass cleaner before attaching the rear-view mirror to the windscreen.

Tomorrow, I want to get the car on its wheels and finished off to the level that I want to get it to Caterham. This is easily within reach and will just require a little focus!